Quickstart Video
Sign-In / Sign-up Process
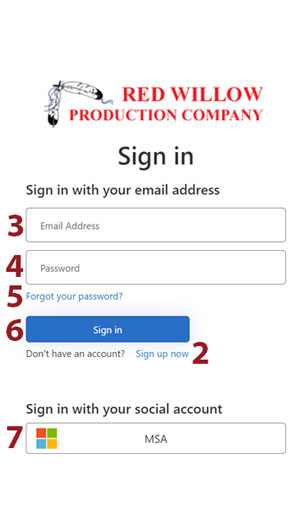
Red Willow Business Associate Portal Sign-In or Sign-Up – Home (https://owners.rwpc.us/)
- Sign In or Sign Up – Sign-In to your existing account or Sign-Up for a New Account
- Sign up now – Sign up for a new account.
- Email Address – Sign in with an email address that was previously used when signing up for an account.
- Password – Sign in with a password that was previously used when signing up for an account.
- Forgot your password? – Reset password after verifying email address with a verification code.
- Sign In – Sign in with an email address and password that was previously used when signing up for an account.
- Sign in with your social account – Sign in with a Microsoft Social Account.

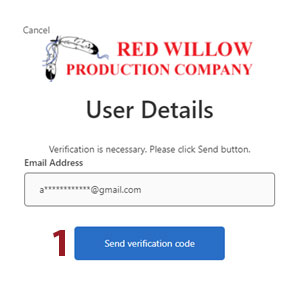
Red Willow Business Associate Portal – Account Sign-Up User Details
- Email Address – Enter email address. This will become your username.
- Send verification code – Send a varication code to the Email address entered above.
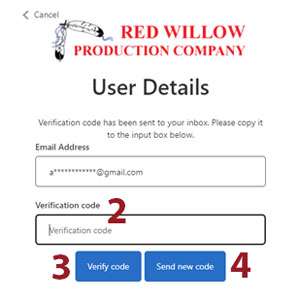
- Verification code – Enter the code that was received in an email from Microsoft on behalf of Red Willow Production Company. It can take up to 2 minutes to receive the email with a verification code. If do not see an email with a verification code in your inbox, verify the email address that was entered is correct and check all other email folders, including your spam folder.
- Verify Code – Verify the code you enter matches the code received in the Email.
- Send New Code – (Not Required) Send new code to the Email address if you wish to receive a new code.
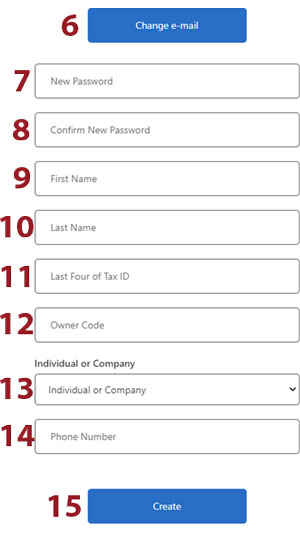
- Change e-mail – (Not Required) Change the email address if you wish. This will become your username.
- New Password – Create a new password.
- Confirm New Password – Confirm new password by entering password again.
- First Name – First Name.
- Last Name – Last Name.
- Last Four of Tax ID – The Last 4 numbers of the Tax ID associated with the account on file with Red Willow.
- Owner Code – The Owner Code associated with the account on file with Red Willow.
- Individual or Company – Indicated if the account is for an Individual or Company.
- Phone Number – The phone number to be associated with the account.
- Create – Create the account

Red Willow Business Associate Portal – Account Sign-In with Verification Code
- Send verification code – Send verification code to the Email address above.
- Verification code – Enter the code that was received in the Email.
- Verify Code – Verify the code you enter matches the code received in the Email.
- Send New Code – (Not Required) Send new code to the Email address if you wish.
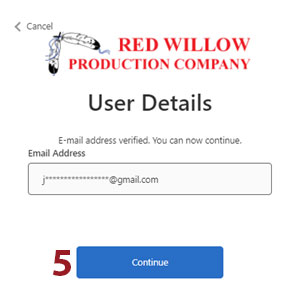
- Continue – Click continue.
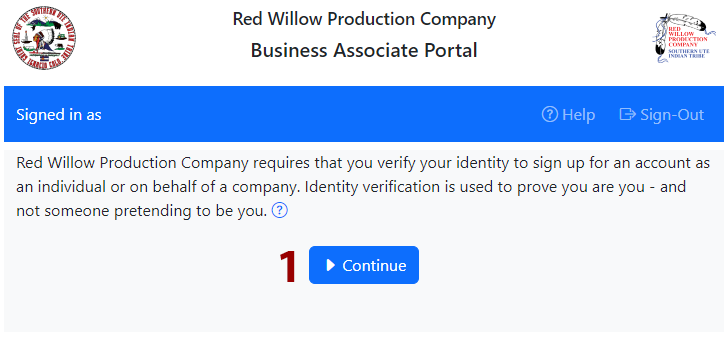
ID Verification
Identity Verification
- Continue – After signing in, click the Continue button.
- Continue – To begin the verification process.
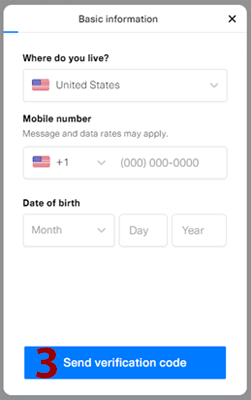
- Send verification code – Select a country, enter your mobile phone number, your birth date You will receive text message that reads: “Your Red Willow Production Company verification code is: XXXXX”.
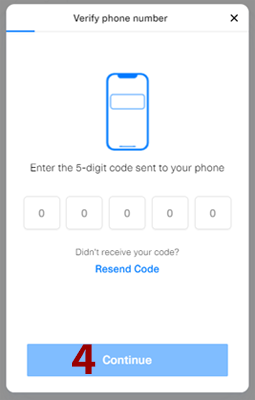
- Continue – Enter the verification code that was sent to your phone.
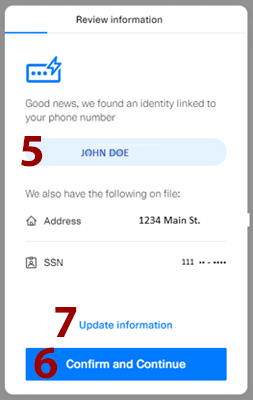
- If an identity is found that is linked to your phone number, you will have the option to use the information that was found.
- Confirm and Continue – To use the identity info that is linked to your phone.
- Update information – To change the identity info that was found.
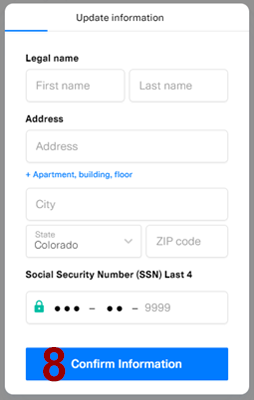
- Confirm Information – If prompted, enter your Legal name, Address, and Last 4 of your Social Security Number.
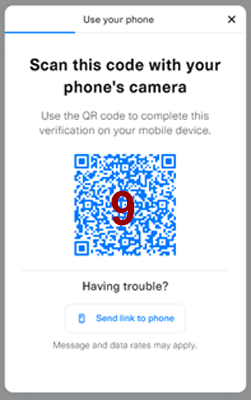
- QR Code – Scan the QR code with your mobile device.
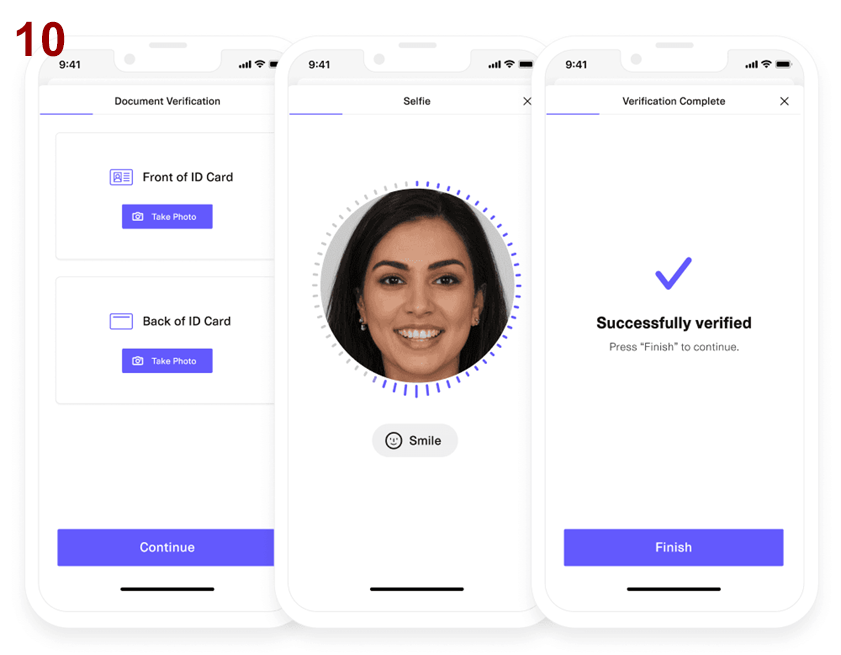
- To complete the process, you will use your mobile device camera to capture front/back of your ID and take a selfie to upload.

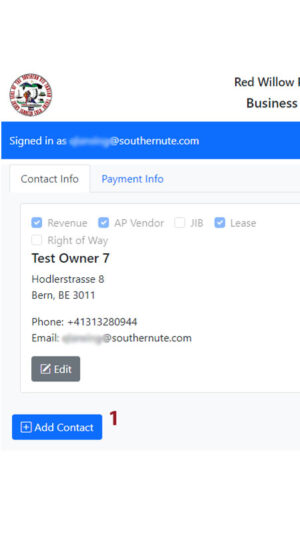
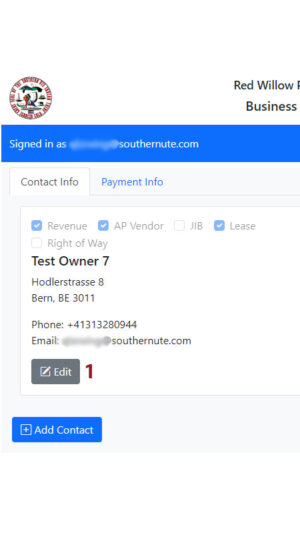
Add Contact
Contact Information
- Navigate to the Contact Info tab and click Add Contact to add a new address and info.
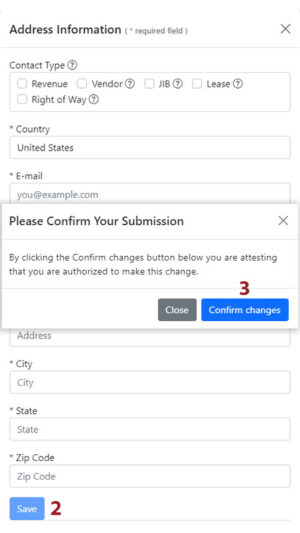
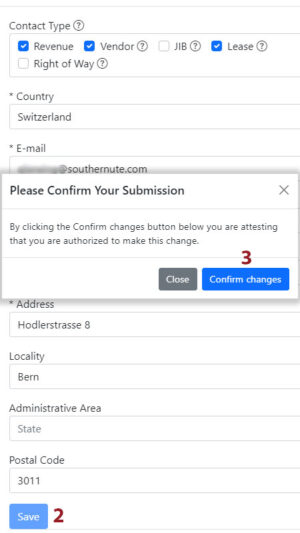
- Complete the new address form and click the Save button.
- You will be asked to confirm your submission and will also receive an email notice to verify your new contact has been added.
Edit Contact
Change Contact Information
- Navigate to the Contact Info tab and click the edit button under the contact you wish to update.
- Verify your information is correct in the address form and click the Save button.
- You will be asked to confirm your submission and will also receive an email notice to verify your updates have been made.
Add Payment
These steps are for setting up a new automatic payment to your bank or financial institution if an existing account was not on file.
ACH Payment Information
- Navigate to the Payment Info tab and click the ACH payment type.
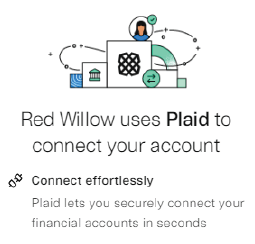
- Verify your information is correct and click Add Bank Info. You will use Plaid to connect to your bank account and be asked to confirm your submission. A verification email will send to confirm the new account was added.
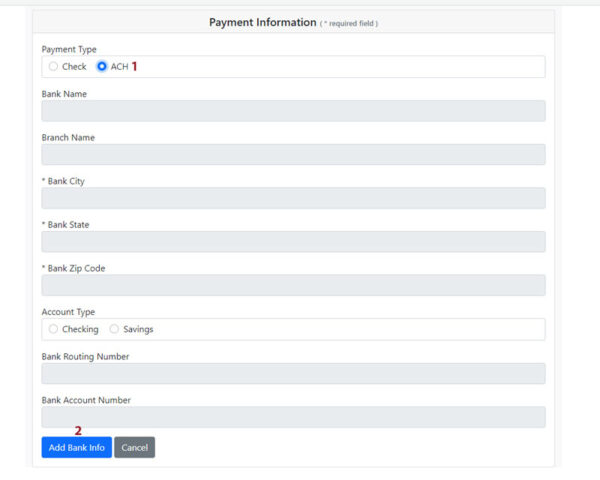
NOTE: If payment type Check is selected you can choose to switch to ACH payment or continue to receive a check by mail.
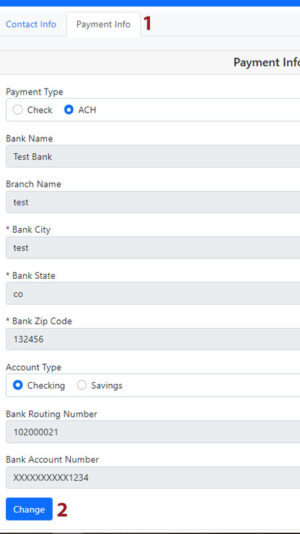
Edit Payment
Change ACH Payment Information
- Navigate to the Payment Info tab and verify you have at least one bank account on file.
- Click the Change button and follow the Plaid connection steps to log into your banking account and select the accounts you want to connect. Confirm your submission and save.
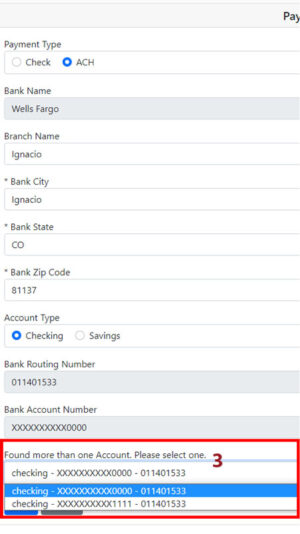
- If more than one account was found, please select an account in the dropdown labeled “Found more than one Account. Please select one”